

As creators, we all begin with a vision — an image in our minds that feels just out of reach. For me, that vision was always a high-end, fashion-forward photo lit with precision, mood, and intention. I used to look at the work of world-renowned photographers and wonder how they crafted such iconic, captivating images.
Coming from a flash photography background, I knew how powerful light could be. But I often found it time-consuming and limiting — especially when I couldn't see my changes in real time. That all changed when I discovered Harlowe.
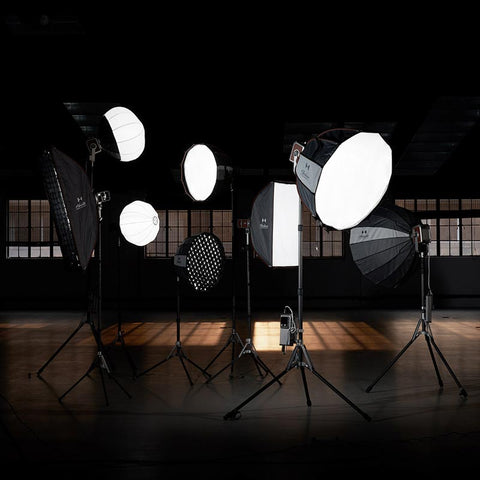
In this blog, I'll break down the exact 10-light constant lighting setup that brought my vision to life. You'll learn how each light was placed, what modifiers were used, and how they worked together to create a moody, high-fashion image. This isn't about numbers; it's a blueprint for what's possible when you have the right tools and the courage to create without limits.


Creating with Intention, Not Just Equipment
Working with constant lighting gave me something flash never could — immediacy. I could see my light, adjust it, and refine my vision on the spot. Suddenly, the process became intuitive. I was able to push past technical hurdles and immerse myself in pure creativity.
For this shoot, I wanted something moody, mysterious, and fashion-forward. Our model wore all black — a bold statement, especially in contrast to playful polka-dot dresses often seen in fashion editorials, requiring thoughtful lighting to create contrast and intrigue.


The Blueprint: Building the Look Step-by-Step
Before we dive into the details, here is the complete 10-light recipe used to create the final image. This quick summary shows how each light played a specific role in building the moody, fashion-forward look.
- Background Lights (2): 2x Harlowe Pro (with blue gels) to create the overall color tone.
-
Gobo Pattern Lights (3):
- 1x Harlowe Pro 300W (Center, set to 6500K) for a cool blue circular pattern.
- 1x Avant 100W (Left, with a cyan gel).
- 1x Avant 100W (Right, with a purple gel).
- Key Lights (2): 2x Max 80 (with magnetic snoots) to sculpt the model's face and blouse.
- Fill Light (1): 1x Max 40 (with barndoors) to reveal texture in the clothing.
- Color Accent Light (1): 1x Blade 10 RGB (set to red) to add creative tension and flare.
- Tested & Removed Light (1): 1x Avant with adjustable lens (used as a rim light but ultimately removed to enhance the mood).
Now, let's break down how each of these elements came together step-by-step.
Step 1: Creating a Moody Atmosphere with Gelled Background Lights
I started by lighting the background. I used two Harlowe Pros (300W) with blue gels to bathe the scene in a chilling, cinematic tone. This gave me the moody backdrop I needed to make the black wardrobe stand out.
[[推荐商品1]]
Step 2: Adding Depth and Visual Interest with Gobos
To add depth and visual flair, I used my favorite modifier — the Gobo. One Pro in the middle and two Avant 100Ws on the sides helped me create three circular patterns behind the model.
[[推荐商品2]]
Thanks to Harlowe's magnetic gel attachments, it was effortless to mount a cyan gel on the left Avant and a purple one on the right. I dialed the center Pro to 6500K for a cooler blue tone. The blend of the circular hues complemented her makeup and added an editorial punch.
[[推荐商品3]]
Step 3: Sculpting the Subject (And the Power of Removing a Light)
I experimented with an Avant + adjustable lens on a boom arm to carve the subject from the background. It worked — but I chose to remove it. Sometimes the absence of light says more than its presence. The shot felt more mysterious without it, and that's exactly what I wanted.
Step 4: Defining the Face and Wardrobe with Hard Key Lights
For my key lights, I used two Max 80s with magnetic snoots — one for her face and one for her reflective blouse. These lights gave me sharp control and brought sculpted contrast to the image, letting the subject's presence dominate the frame.
[[推荐商品4]]
Step 5: Revealing Texture with a Precise Fill Light
I added a Max 40 with barndoors to the model's left, introducing a soft fill light to reveal texture and detail in her clothing. It was subtle but essential.
[[推荐商品5]]
Step 6: Injecting Creative Tension with an RGB Accent Light
Still feeling like something was missing, I grabbed a Blade 10 RGB light. I set it to red and let it spill into the scene, creating a flare of creative tension against the cooler tones. That final stroke made the whole image come alive.
[[推荐商品6]]
The Pre-Processed Raw Adjustment: Finishing the Vision
As I shot everything through Capture One, I pushed the colors just enough to emphasize the contrasts and mood I had built on set. The raw file held up beautifully — proof that starting with strong lighting gives you freedom in post.
Your Gear Should Serve Your Vision
This shoot wasn't about having 10 lights. It was about chasing an idea and not stopping until I saw it come to life. Whether you're working with one light or ten, the most important thing is that your gear inspires you to create.
Harlowe didn't just give me tools — it gave me confidence and clarity. If you're a creator chasing high-end, fashion-level imagery, remember:
- See the light. Shape the light. Trust your eye.
- Let your vision guide the gear — not the other way around.
- And above all, don't be afraid to push your creative boundaries.
Because you'll never know what's possible until you do. Ready to create without limits? Explore the Harlowe lighting collection here.


