Picture a portrait where shadows dance across a subject's face, creating mystery and depth. Now imagine the same person under flat, even light—the magic disappears. This transformation happens because photography lighting shapes every emotion, tells every story, and creates every mood in your images.
Light Characteristics Explained
To really control how your photos look, it helps to know the four main things about light.
Intensity: This is how bright or dim the light is. Bright light can make a photo feel lively, while dim light can make it feel cozy. When you're using a photography lighting kit, changing the intensity is the first thing you can do to change the mood.


- Regular price
- Sale price
- from $1,451.00
Color temperature: This is measured in Kelvin and changes how a photo feels. Warm light (like from a sunset) makes things feel golden and comfortable. Cool light (like daylight) makes things feel sharp and professional. Many new LED lights let you change the color temperature easily, which gives you more control over your photos.
Direction: The direction of light makes a big difference in how things look. Light from the front can make things look flat. Light from the side makes shadows that show shape and texture. Light from behind can create cool outlines or silhouettes.
Diffusion: This controls how strong or soft the shadows are. Harsh light makes sharp shadows, which is good for showing texture. Diffused light makes soft shadows, which is good for making people look their best in portraits. Many professional lights have attachments or modifiers you can add to them to make the light softer or stronger.

Choosing the Right Lighting for Your Photos
The Benefits of LED Systems
LED lights have really changed photography. Unlike flash, these lights show you exactly how the shadows and highlights will look in your photo. The real-time preview makes it much easier to learn about lighting.
Many new LED lights can switch between warm and cool colors, so you can easily change the look of your photos. For example, the Harlowe Max 80W LED photography light kit is a great choice for both beginners and professionals. These versatile lighting solutions are essential tools for elevating the quality of any visual production.


- Regular price
- Sale price
- from $976.00
Transform Your Light with These Modifiers
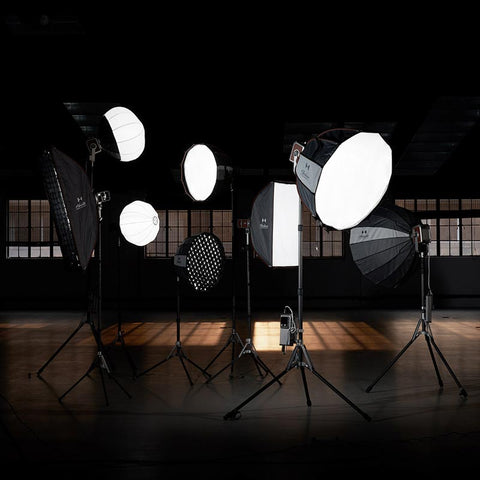
Softboxes: These turn harsh, focused lights into soft, wide lights. They're great for taking pictures of people or products. The bigger the softbox, the softer the light. You may want to try the Harlowe deep quick release softbox lighting 30in/47in.


- Regular price
- Sale price
- from $418.00
Reflectors: These bounce light back onto your subject to fill in shadows. Silver reflectors keep the light the same color and give a strong reflection. Gold reflectors add a warm color. White reflectors give a soft, natural light.
Snoots: These focus light into a small circle. They're good for highlighting a specific part of your subject.
Barn doors: Barn doors let you control where the light goes. They stop light from spilling onto the background or other things you don't want lit up.

4 Important Lighting Tips for Photographers
How far away the light is matters: The farther away the light, the less bright it is. If you double the distance between the light and what you're photographing, the light becomes four times weaker. Knowing this helps you figure out how to set your camera and control the light.
Three lights are better: Using a 3-light setup is still the best way to set up professional lighting. The main light shines on your subject and sets the overall look. A second light fills in the shadows made by the main light. A third light shines on the background to separate it from your subject.
Control the mood with light: Changing the brightness of your lights can change the feeling of your photo. If the main light and the fill light are the same brightness, you get a soft, even light. If the main light is four times brighter than the fill light, you get more shadows but still see details. The bigger the difference, the more dramatic the photo.
Bright or dark: Bright, even lighting with few shadows makes a photo feel happy and energetic. Dark lighting with lots of shadows creates a dramatic, mysterious feeling. You can get either effect by choosing the right lights and putting them in the right place.
Natural Light: Your Most Powerful Tool
Natural light is free and always changing, so it's important to know how it works.
Golden hour: This is the hour after sunrise and the hour before sunset. The light is warm and soft, which looks good on almost everything. The sun is low in the sky, making long, gentle shadows.
Blue hour: This is the time when the sun has set, but there is still light in the sky. The sky acts like a big softbox, giving a cool, even light. This is great for taking pictures of cities or people outside, especially if you use some artificial light to balance it out.
Overcast days: When it's cloudy, the light is soft and even. This gets rid of harsh shadows, which is perfect for taking pictures of people. A lot of photographers like cloudy days better than sunny days for outdoor portraits.
Window light: You can control natural light indoors by using windows. Big windows work like big softboxes, and sheer curtains make the light even softer. You can use reflectors on the opposite side of the window to fill in shadows and balance the light.
5 Common Lighting Mistakes to Avoid
Shadows on faces: A lot of portrait photos have harsh shadows on people's faces. To fix this, move the lights closer to the camera or add a fill light. You can also put people near big windows for a natural, flattering light.
Weird colors: If you use different kinds of lights together, you can get strange colors in your photos. You can use color filters to make the lights match, or you can adjust the colors in editing software.
No separation: If the subject and background blend together, the photo can look flat. To fix this, add a light to the background or move the subject away from the wall. This creates depth.
Too much soft light: Too much soft light can make the photo look flat and boring. A little bit of shadow adds interest. It takes practice to find the right balance between hard and soft light.
Bad light placement: Putting lights too high or too low can also cause problems. For portraits, putting the light at eye level usually looks the most natural. For products, putting the light slightly above works well.
Become a Lighting Pro and Improve Your Photos
Knowing how to use light well is what makes a photographer truly great. Whether you're using natural light from a window or a fancy lighting kit, understanding these ideas will help you be more creative. Start by trying out one light source, and then slowly add more as you get better. Every photo you take is a chance to learn more about how light can change things.


